DataStore - CRUD (Create Read Update Delete)
The line between the backend and the frontend is broken! An innovative step in the evolution of state managers.
Goodbye Redux, MobX, Apollo!#
One of the most difficult tasks in developing web and mobile applications is to synchronize data between devices and perform offline operations. Ideally, when the device is offline, your customers should be able to continue to use your application not only to access data, but also to create and modify it. When the device returns online, the application must reconnect to the backend, synchronize the data and resolve conflicts, if any. Correct handling of all extreme cases requires a lot of undifferentiated code, even when using the AWS AppSync SDK cache on a device with autonomous mutations and delta synchronization.
Amplify DataStore provides persistent storage on the device for recording, reading and monitoring data changes if you are connected to the Internet or offline, and also makes it easy to synchronize data with the cloud and between devices.
Amplify DataStore allows developers to write applications using distributed data without writing additional code for an offline or online script.
You can use the Amplify DataStore for offline use in local-only mode without an AWS account or provide the entire backend using AWS AppSync and Amazon DynamoDB.
The DataStore includes Delta Sync using your GraphQL backend and several conflict resolution strategies.
Advantages of AWS Amplify DataStore over Redux, MobX, Apollo, Relay, selectors:#
Comparing AWS Amplify with Redux, MobX is not correct, since AWS Amplify is not only a state manager, but also a client-server, so in the client-server class we will compare it with Apollo and Relay.
1. Real time out of the box.#
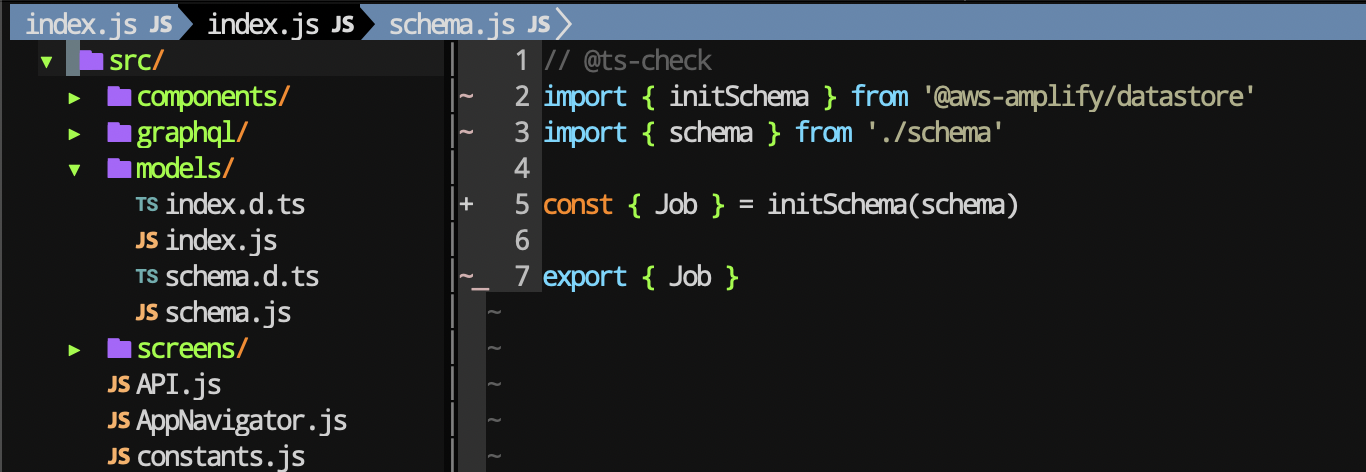
I don’t think that a business can be considered serious if his mobile application is not affected by subscription events implemented using web sockets technology. And how many applications nowadays work on web sockets? I think not, due to the fact that real time is an additional work of developers on the back and front-end. For us, fullStack serverless developers on AWS Amplify, real time goes out of the box, both on the front and on the back and we don’t we need to write an implementation code for integrating web sockets for each model, since it is generated automatically, as well as writing documentation for all of our generated code, implemented in our project based on the GraphQL schema instruction. In order not to scare with big words, I will show you an example from the last lesson, how Store is defined in AWS Amplify:
This determines the model in the store, not only for the frontend, but also for the backend. One source of truth for frontend and backend. Yes, yes, I see that I will repeat it more than once in my life, since this is a killer feature and punch line vs Redux, MobX, Apollo, Relay.
It is this architecture, which is different from Redux, MobX, Apollo, that erases the line between the backend and frontend. And puts AWS Amplify DataStore over everyone
If you are from the backend, then you no longer need to write resolvers to the database and drag subscriptions to each data model.
Serverless - this is when the backend developers came to learn the frontend, as their services are needed exclusively for projects that do not keep up with the times, and from which they do not live real time.
2. Code generation.#
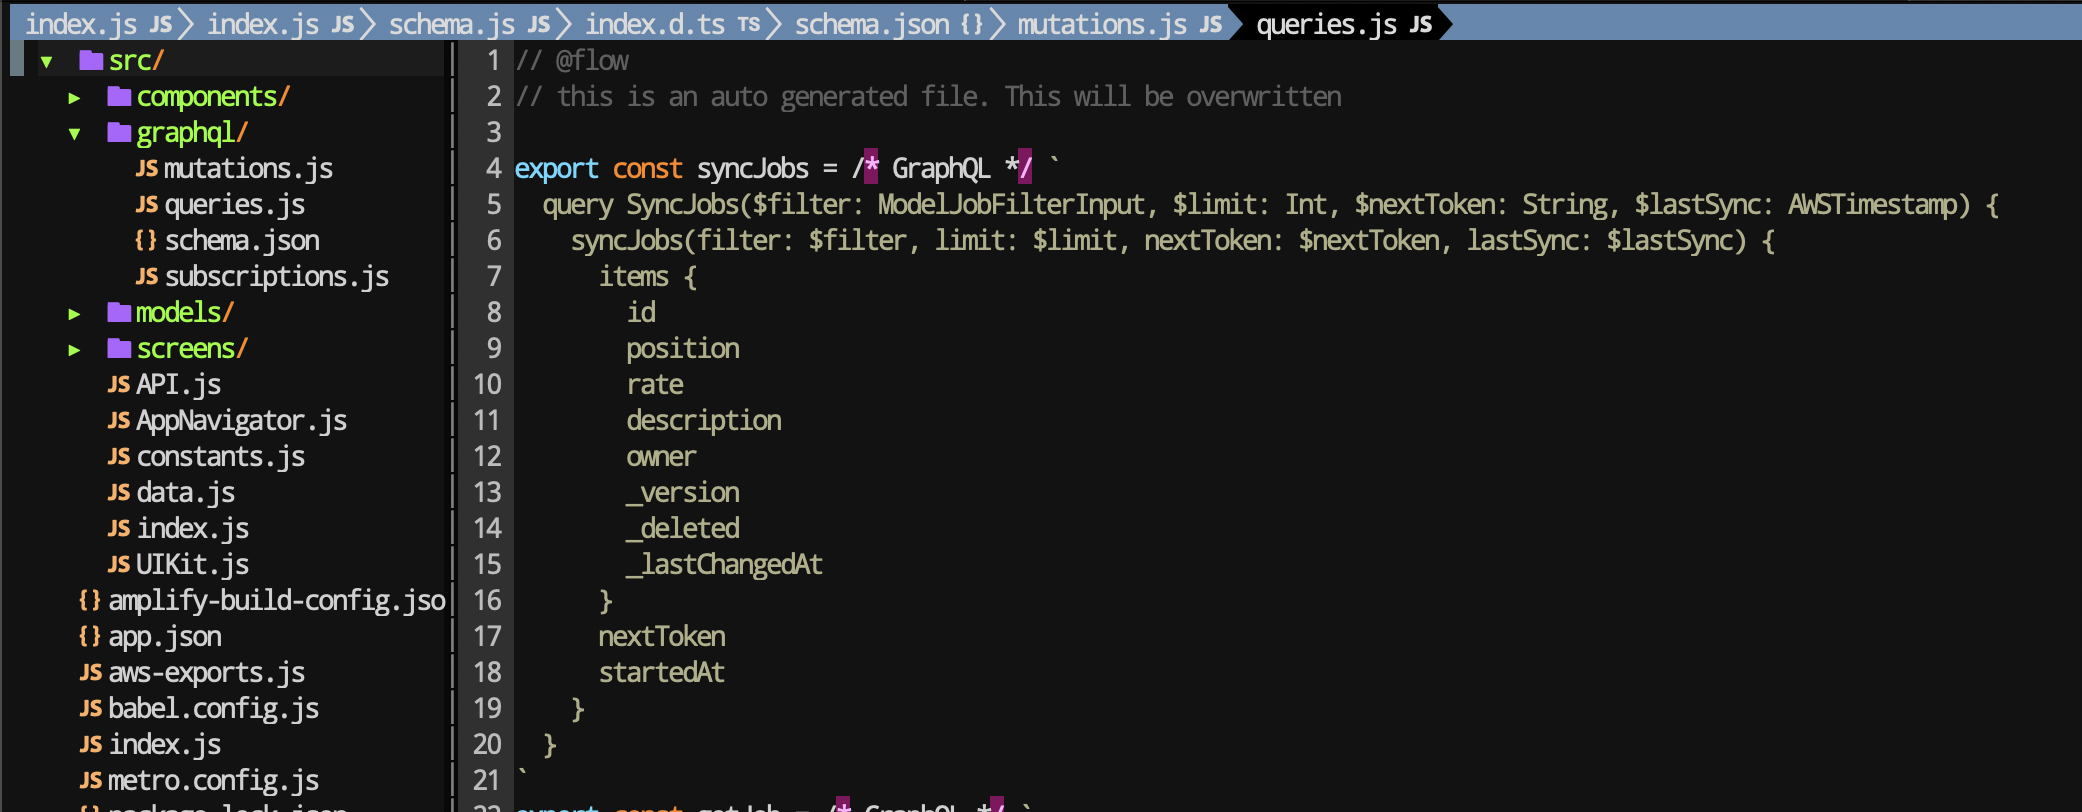
What is code generation you can read without me on Wikipedia, unless of course you know its meaning, which in this punch reminds us of yourself. Use fetch or axios? By sending requests to the deep forest API, which we also write in conjunction with Redux, MobX, Apollo, Relay. So here is another news of the day! You no longer need to write these API calls, you only need to call them. This means that you no longer need to create this rather big daddy with the server request code, since in AWS Amplify DataStore they are also generated in your project based on your store, defined by the very same GraphQL diagram of their first item. And this is filled with one command:
As a result, we get the models folder with the generated code.
And the graphql folder after pushing to the server, with all the request in Flow, TS or vanilla JavaScript.
3. Offline data & cloud sync#
No need to write additional code to send a request to the server after the application is online. Sometimes you find yourself in an unreliable situation, but you better wait longer than obviously fail the operation. Apollo has apollo-link-retry which provides exponential rollback and server requests between default attempts. True, he (currently) does not handle retries for GraphQL errors in the response, only for network errors. Redux, MobX, of course, does not have this solution under the hood, since they are not clients and you have to use third-party middleware, because REST is like a retired grandfather with the support of any grandchildren. Detailed analysis of GraphQL vs REST. AWS Amplify DataStore has not only an analog of apollo-link-retry, but also a built-in and customizable familiar programming model with automatic version control, conflict detection and resolution in the cloud.
Among the disadvantages of AWS Amplify, I want to mention that Apollo hooks with its loading and error out of the box reduce the amount of code written on the front.
At the end of this lesson we will collect with you this mobile application using the Amplify DataStore:
How much does it all cost?#
With AWS AppSync, you pay only for what you use with no minimum fees or mandatory service usage. You are billed separately for query and data modification operations, and for performing real-time updates on your data. This provides you with transparency and a low price regardless of your workload type, because you only pay for the specific AWS AppSync features you use.
Query and Data Modification Operations
Query Operations enable your app to fetch data and cache it locally. Data Modification Operations enable your app to create, update, and delete data.
4.00 dollars per million Query and Data Modification Operations*
Go!#
Our AWS Amplify support chat Discord
The final code for this part can be found on Github.

Clone the repository#
If you continue the last lesson, you can go directly to step 5.
Go to the project folder
Install dependencies
yarn
or
npm install

Register your AWS account#
Step For Those Not Yet AWS Registered We register according to this instructions 📃 and by the video tutorial ем we check all 5 steps.

Initializing AWS Amplify in a React Native Project#
Initialize our AWS Amplify project in the root directory of the React Native project.
We answer the questions:
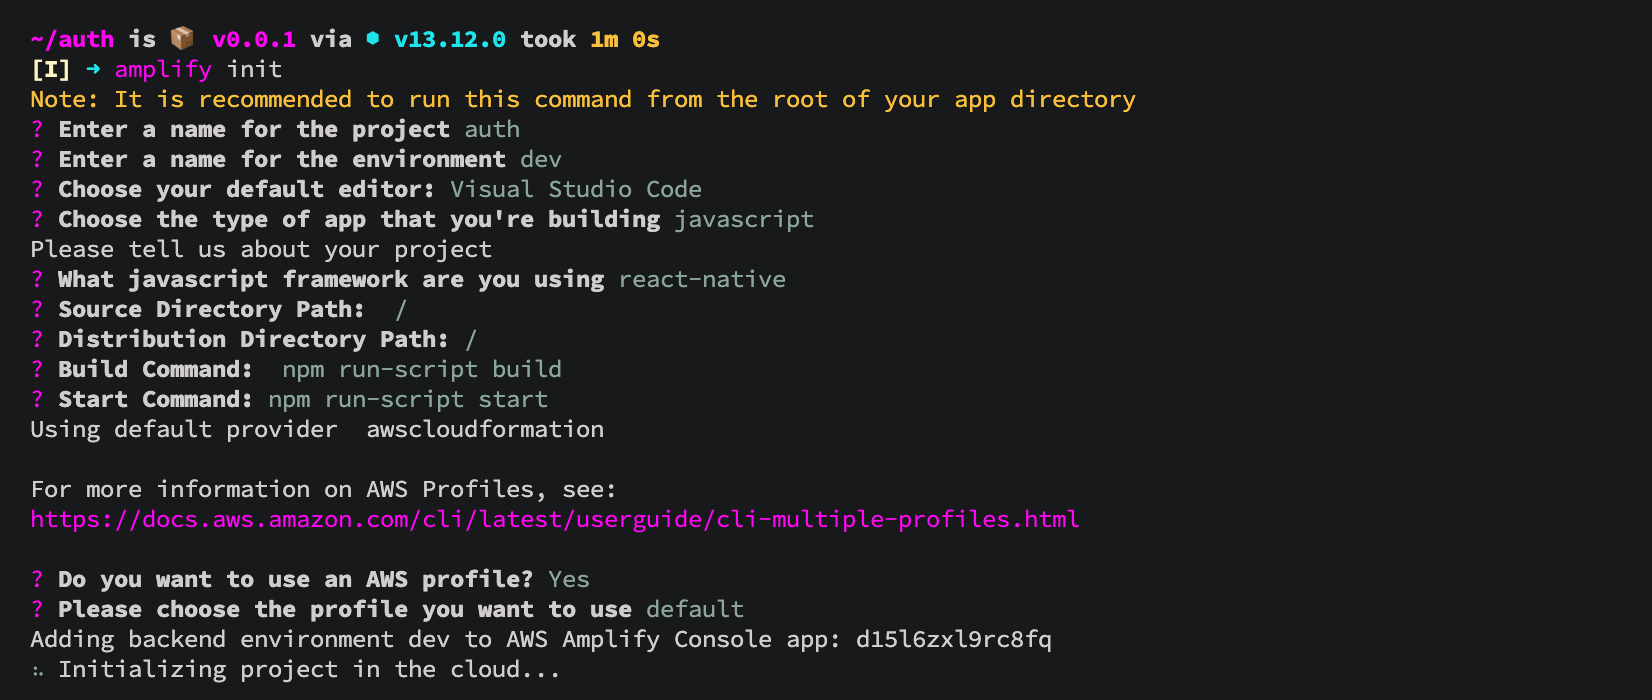
The project was initialized 🚀

Connect the authentication plugin#
Now that the application is in the cloud, you can add some features, such as allowing users to register with our application and log in.
We connect the authentication function.
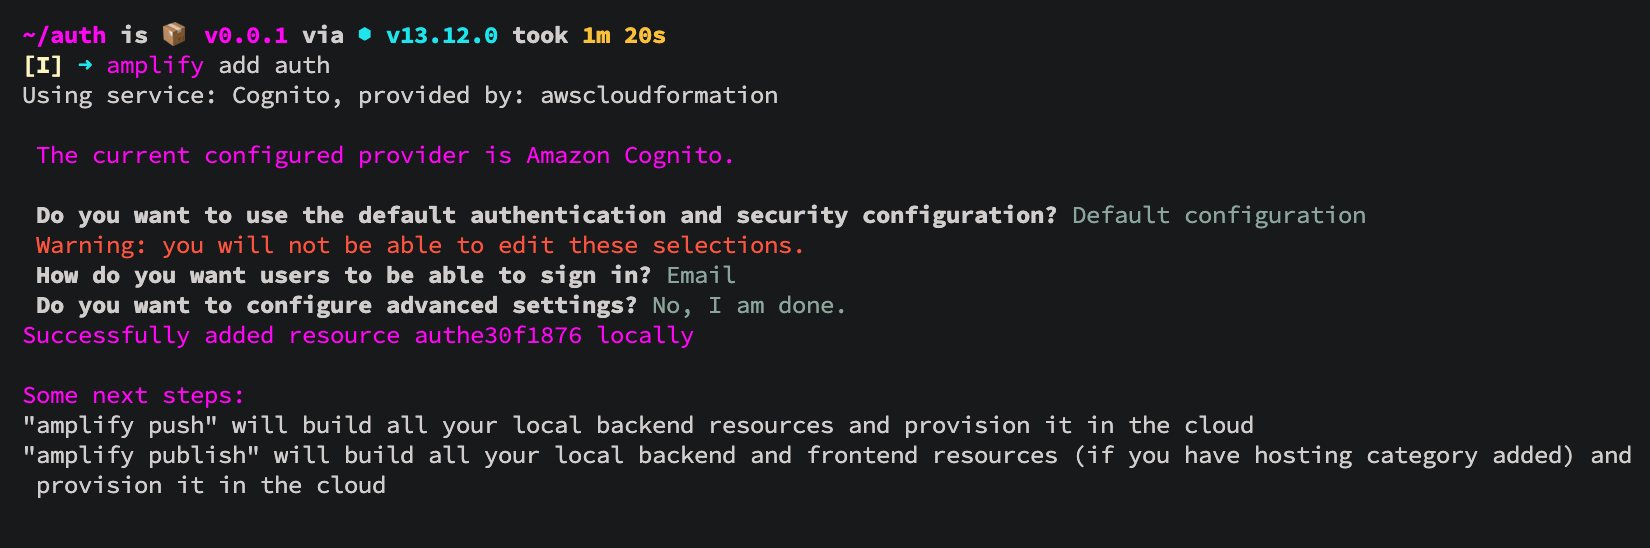
Submitting changes to the cloud 💭
✔ All resources are updated in the cloud
We collect the project and check the operation of authentication.


Installing dependencies#
Detailed installation here
If you have a React Native Cli, then
And if you use React Native> 0.60, then run the following command for iOS:

Connecting the API plugin (App Sync)#
If you connected it in the last lesson, then skip this step. If not, connect the API plugin
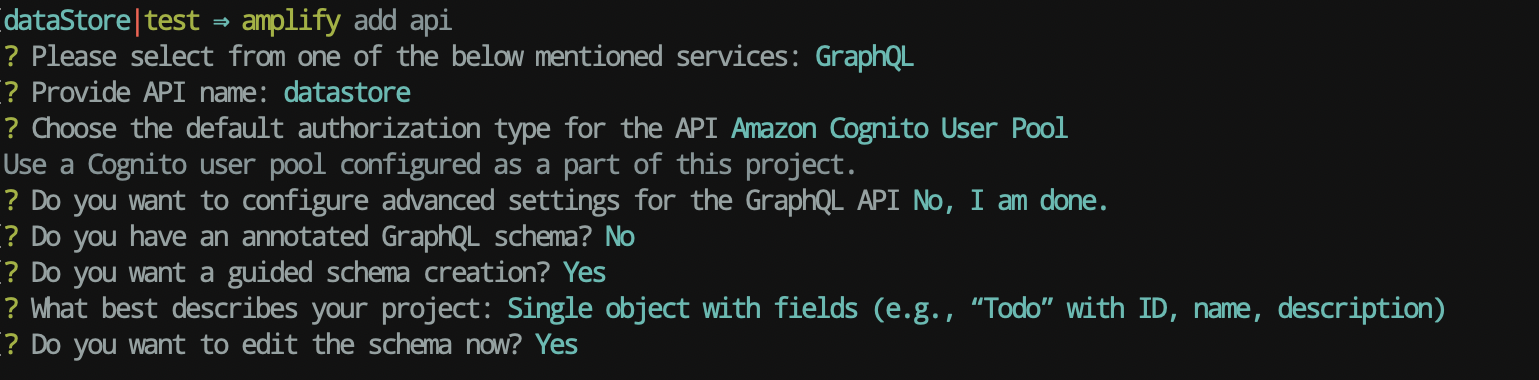
After the selected items, the GraphQL schema will open in amplify/backend/api/<datasourcename>/schema.graphql where we insert this model:
More about here

Model generation#
Modeling your data and creating the models used by the DataStore is the first step to getting started. GraphQL is used as a common language for JavaScript, iOS and Android for this process, and is also used as a network protocol when synchronizing with the cloud. GraphQL also supports some features, such as Automerge in AppSync.
You do not need an AWS account to run it and use DataStore locally, however, if you want to synchronize with the cloud, it is recommended to install and configure Amplify CLI as in the last lesson
Since we described the circuit in the last lesson, now it’s enough for us to run the command
and get the generated model in the src/models folder

Updating API#
We include DataStore for all API

Submitting changes to the cloud 💭
✔ All resources are updated in the cloud

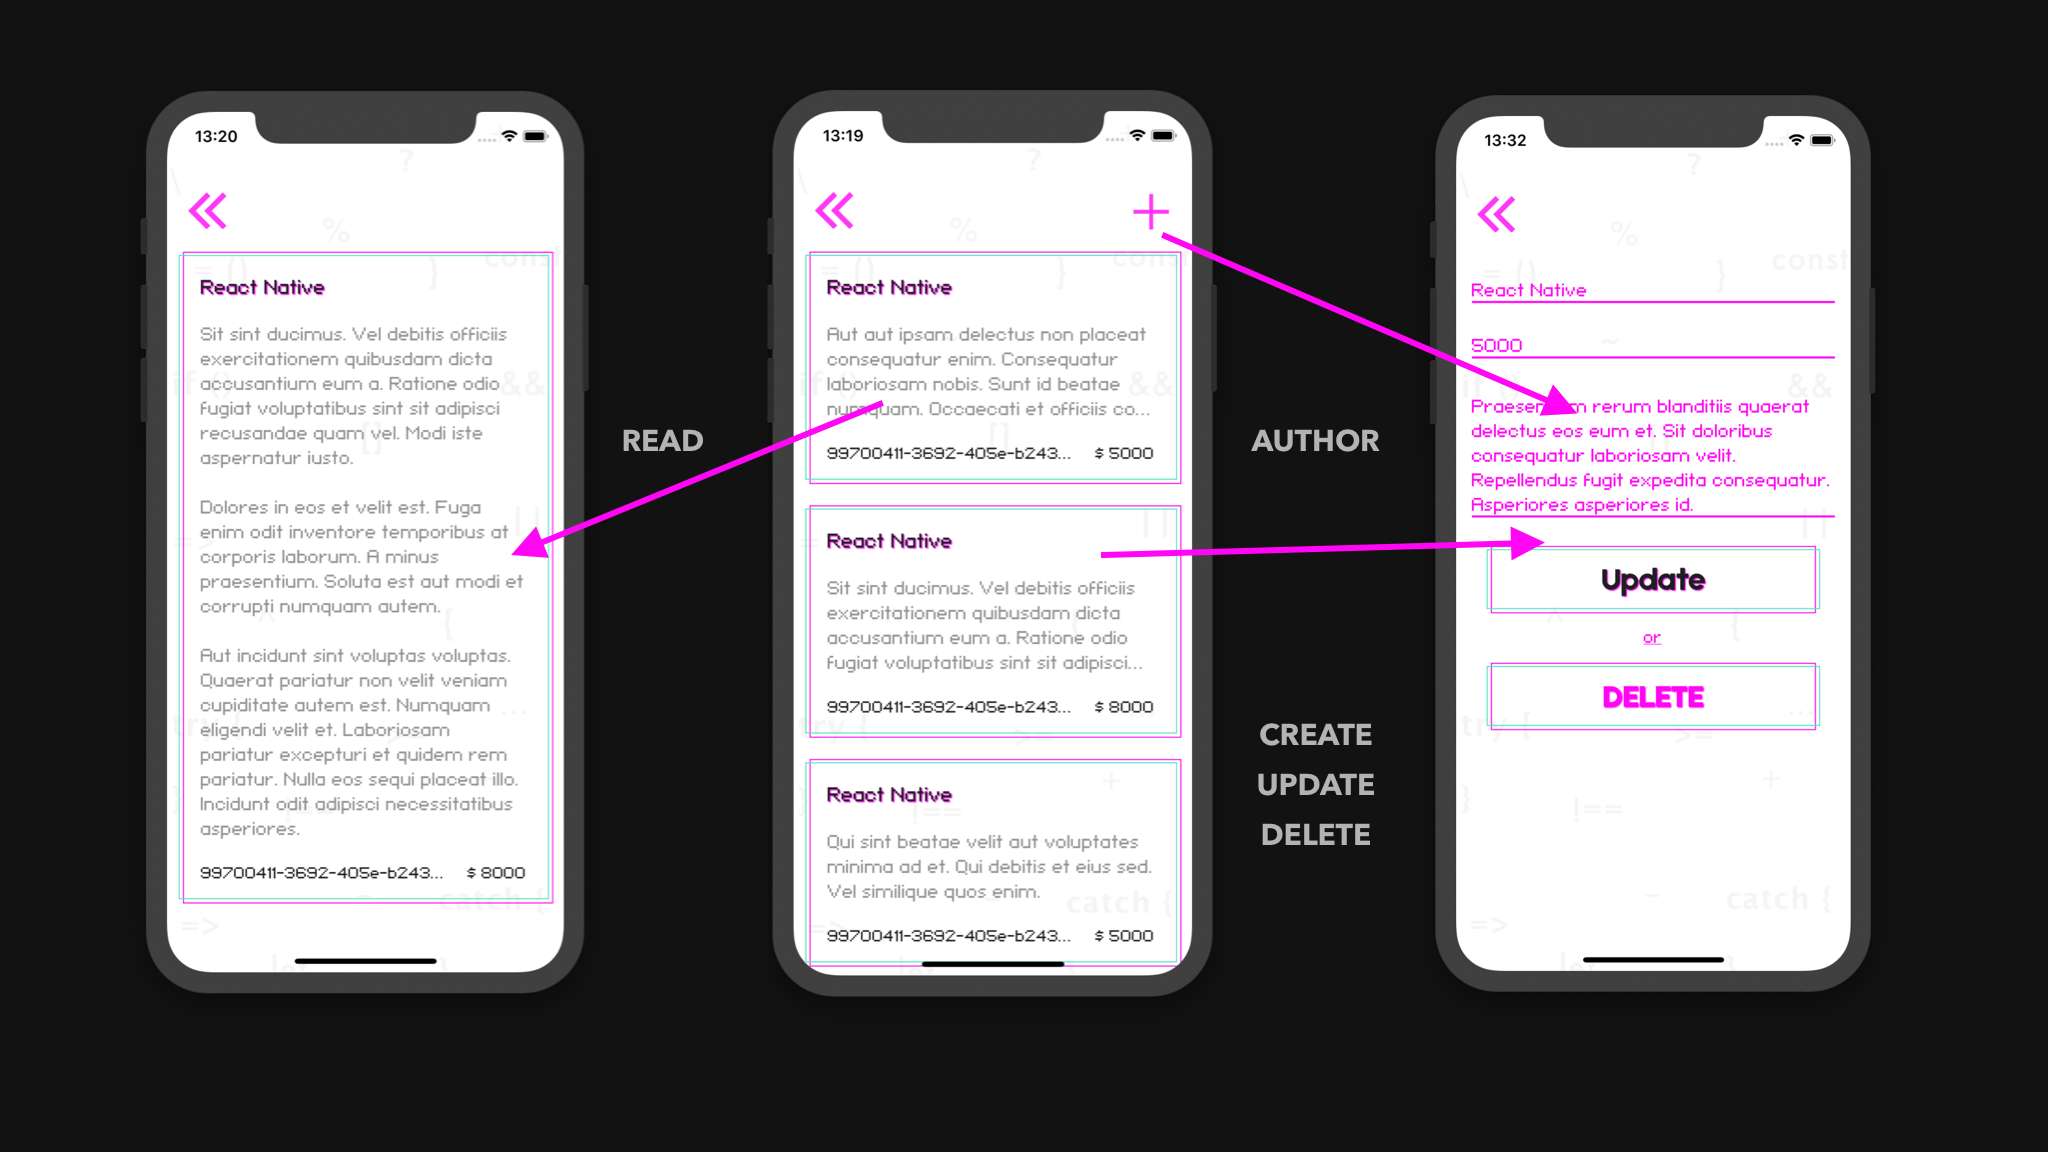
READ#
Create the JobsMain src/screens/Jobs/JobsMain.js screen
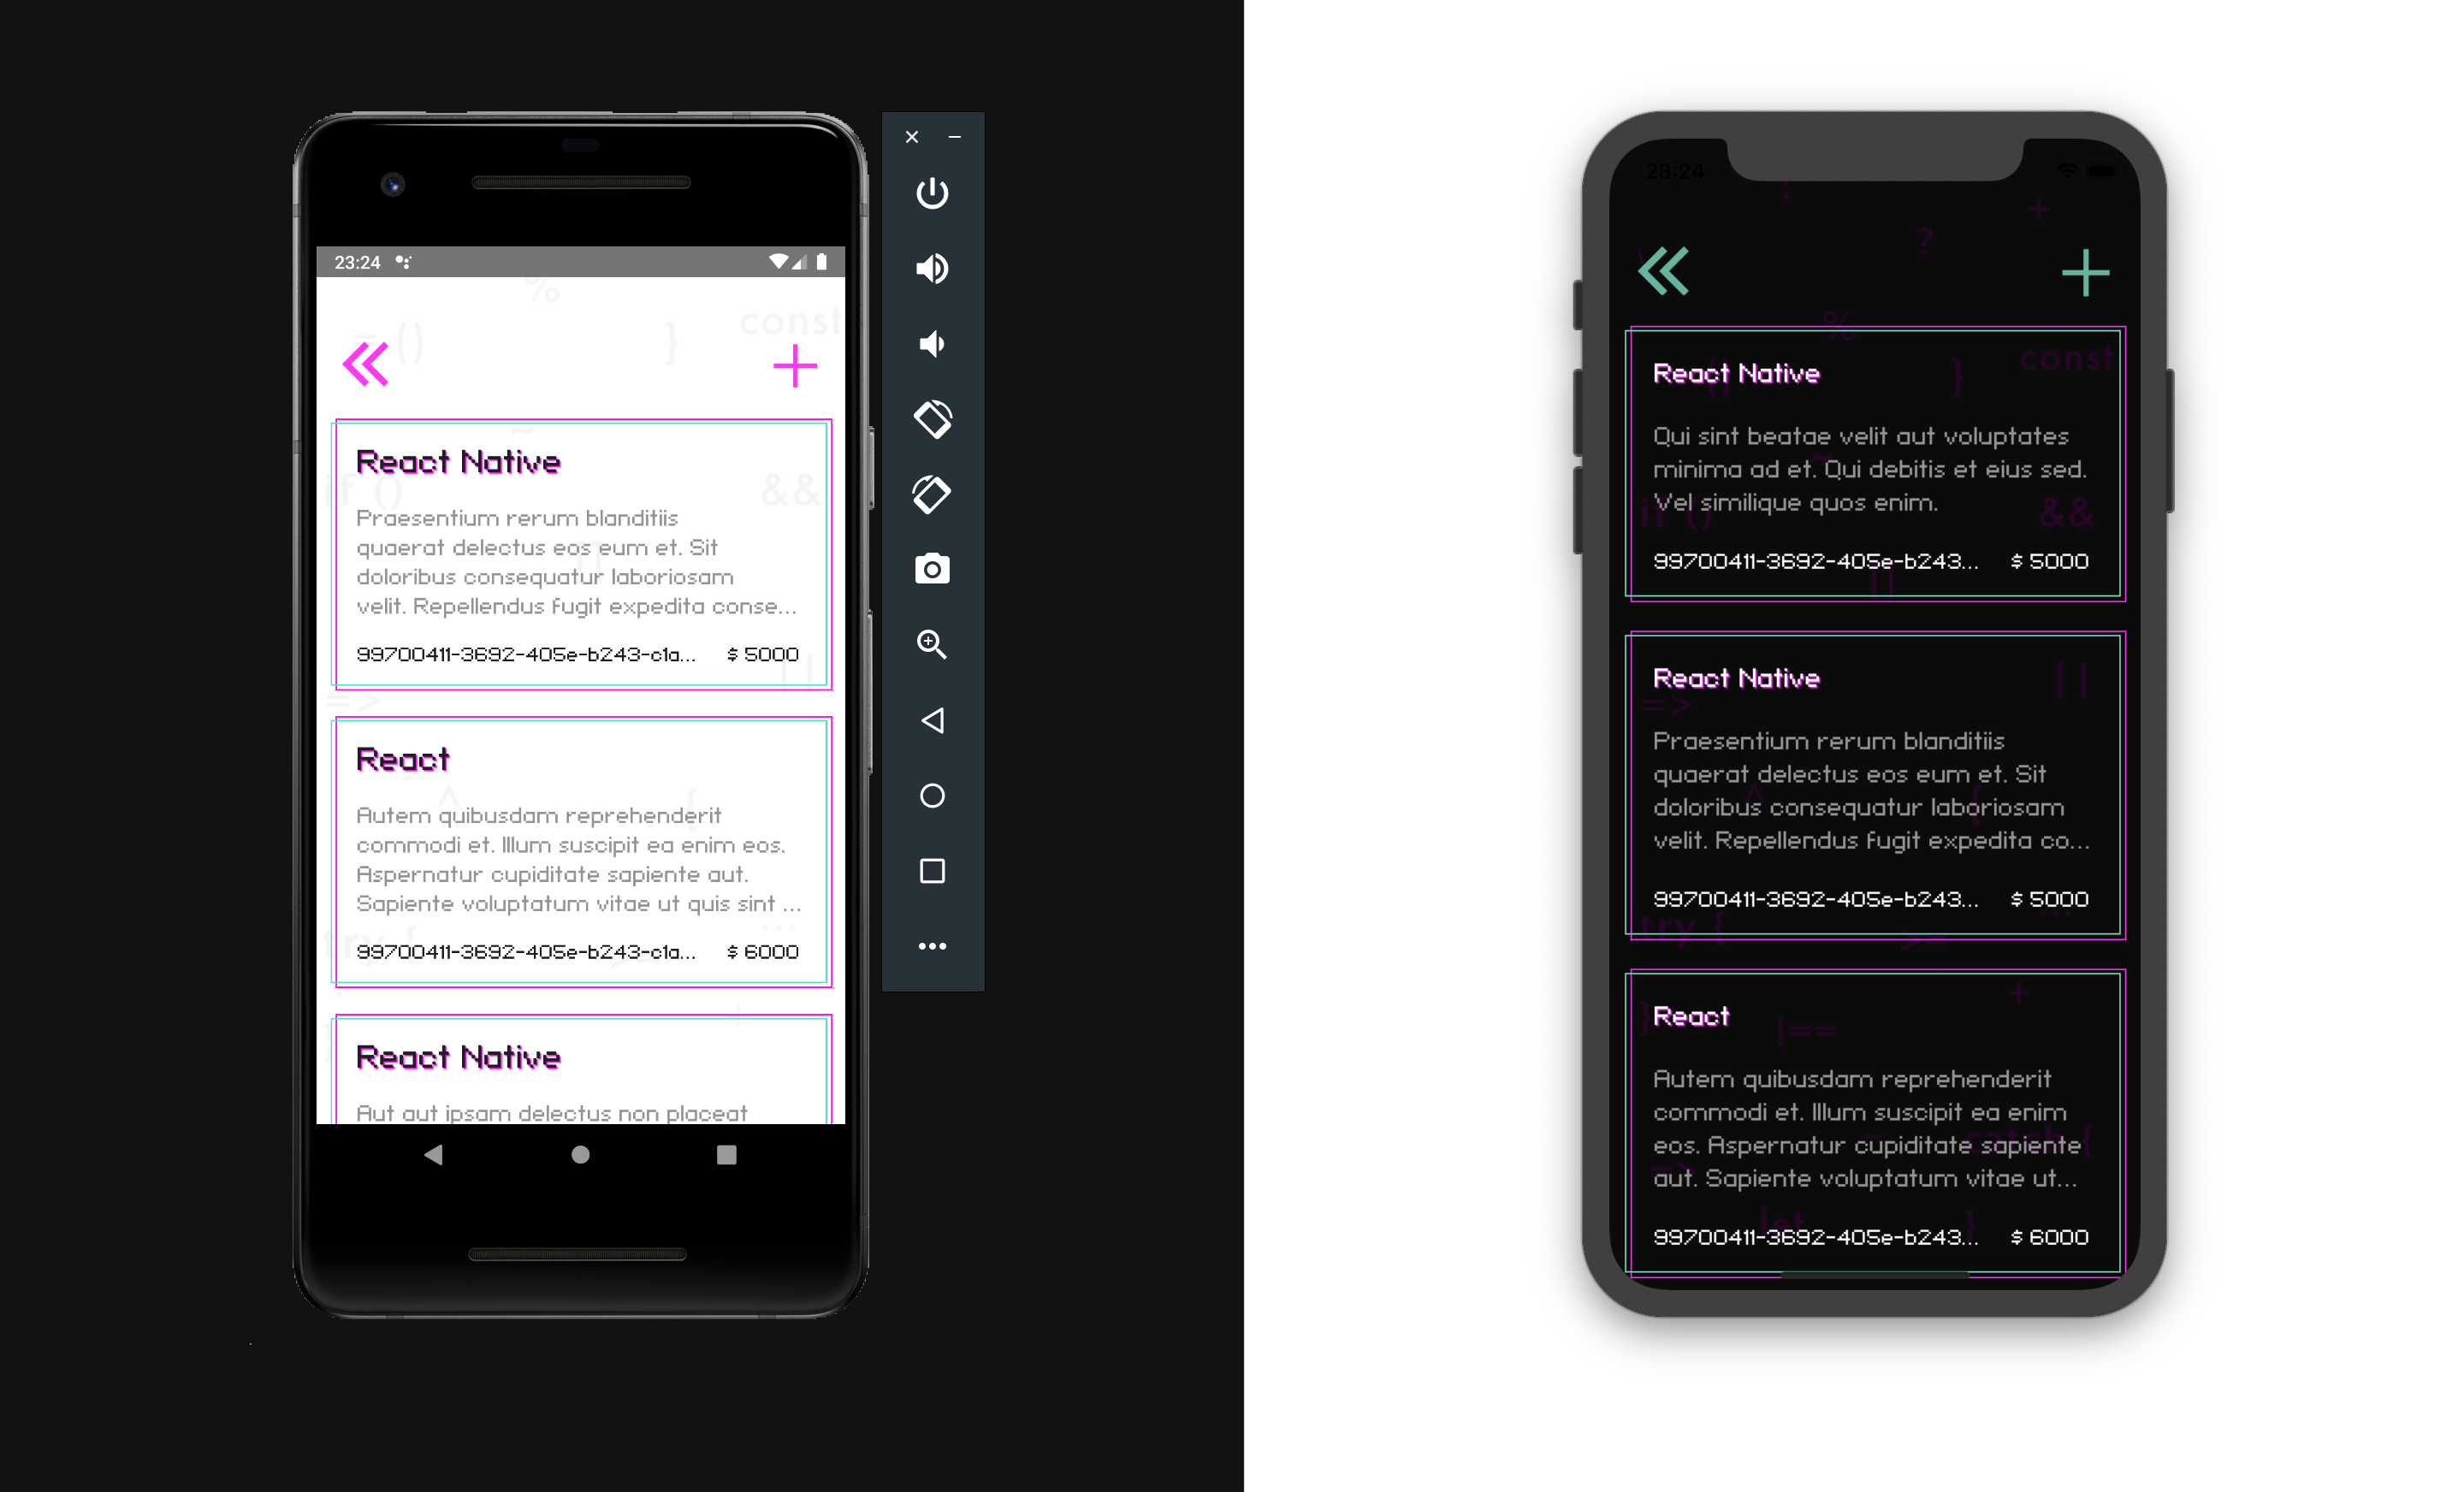
On this screen, we will make a Query query, with the pagination option, where the number is through the useQuery hook and it will return an array to us, which we will send to Flatlist.
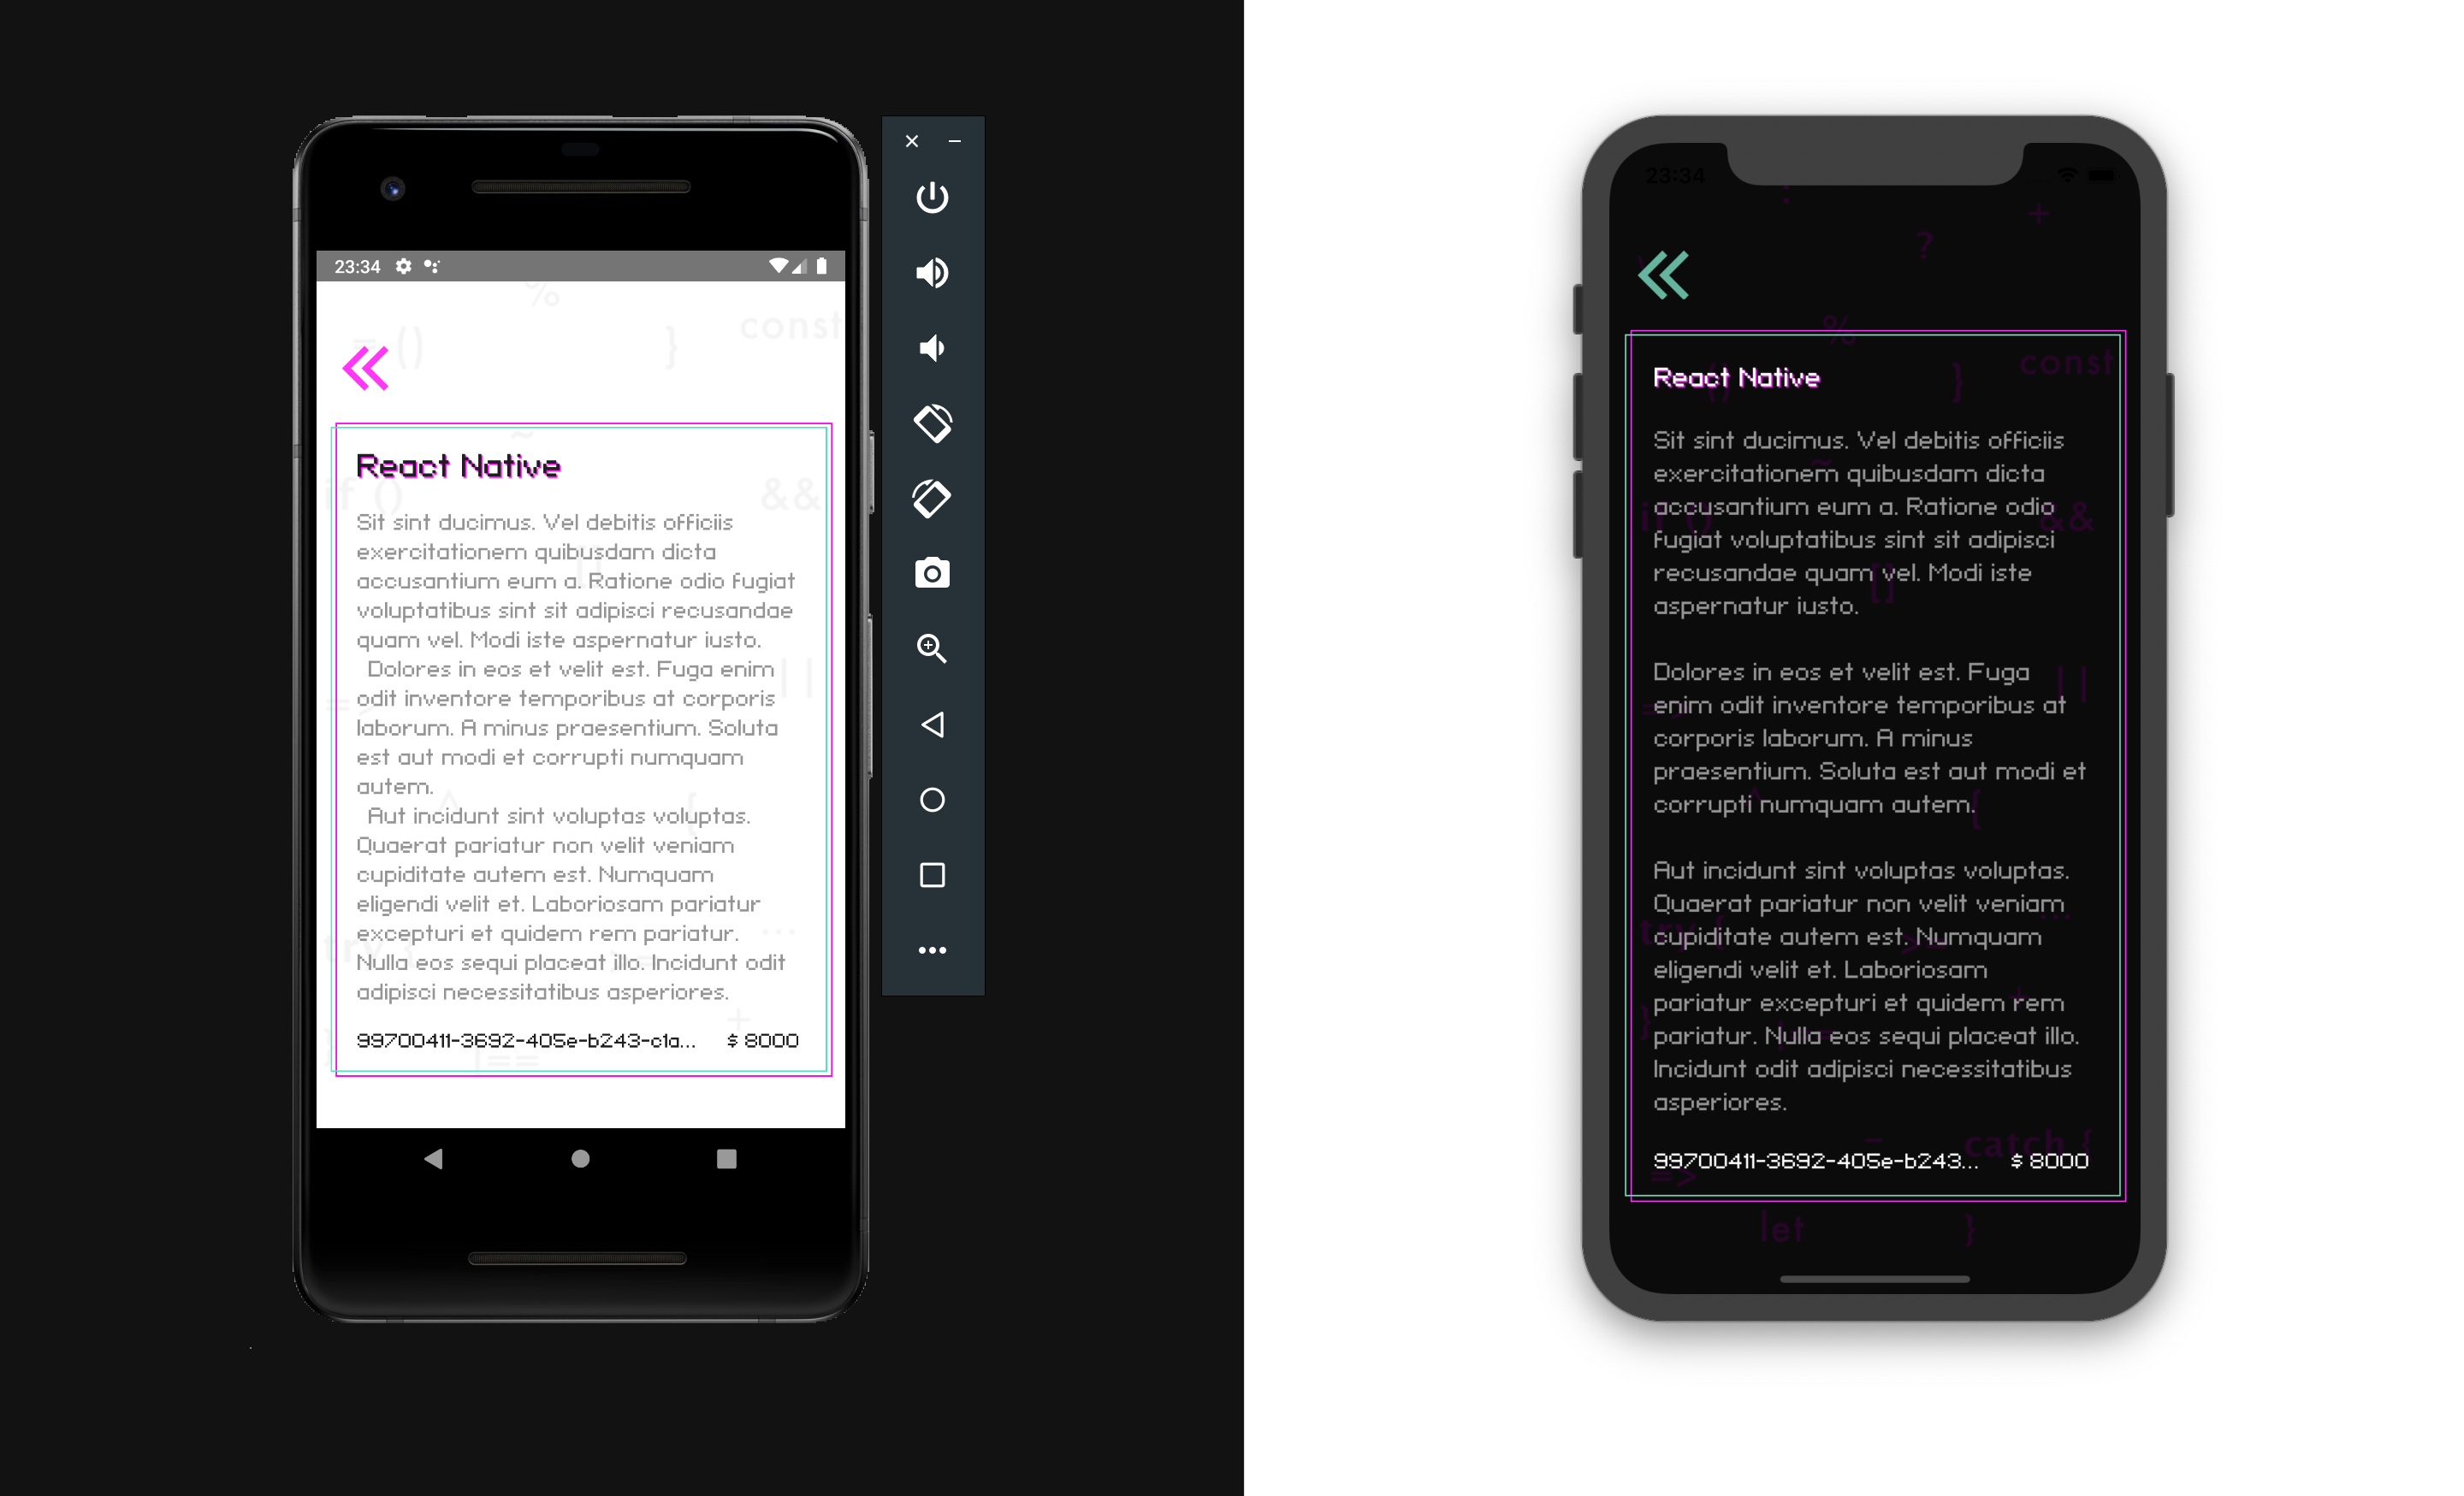
To disclose the details of the vacancy, create the screen JobDetail src/screens/Jobs/JobDetail.js

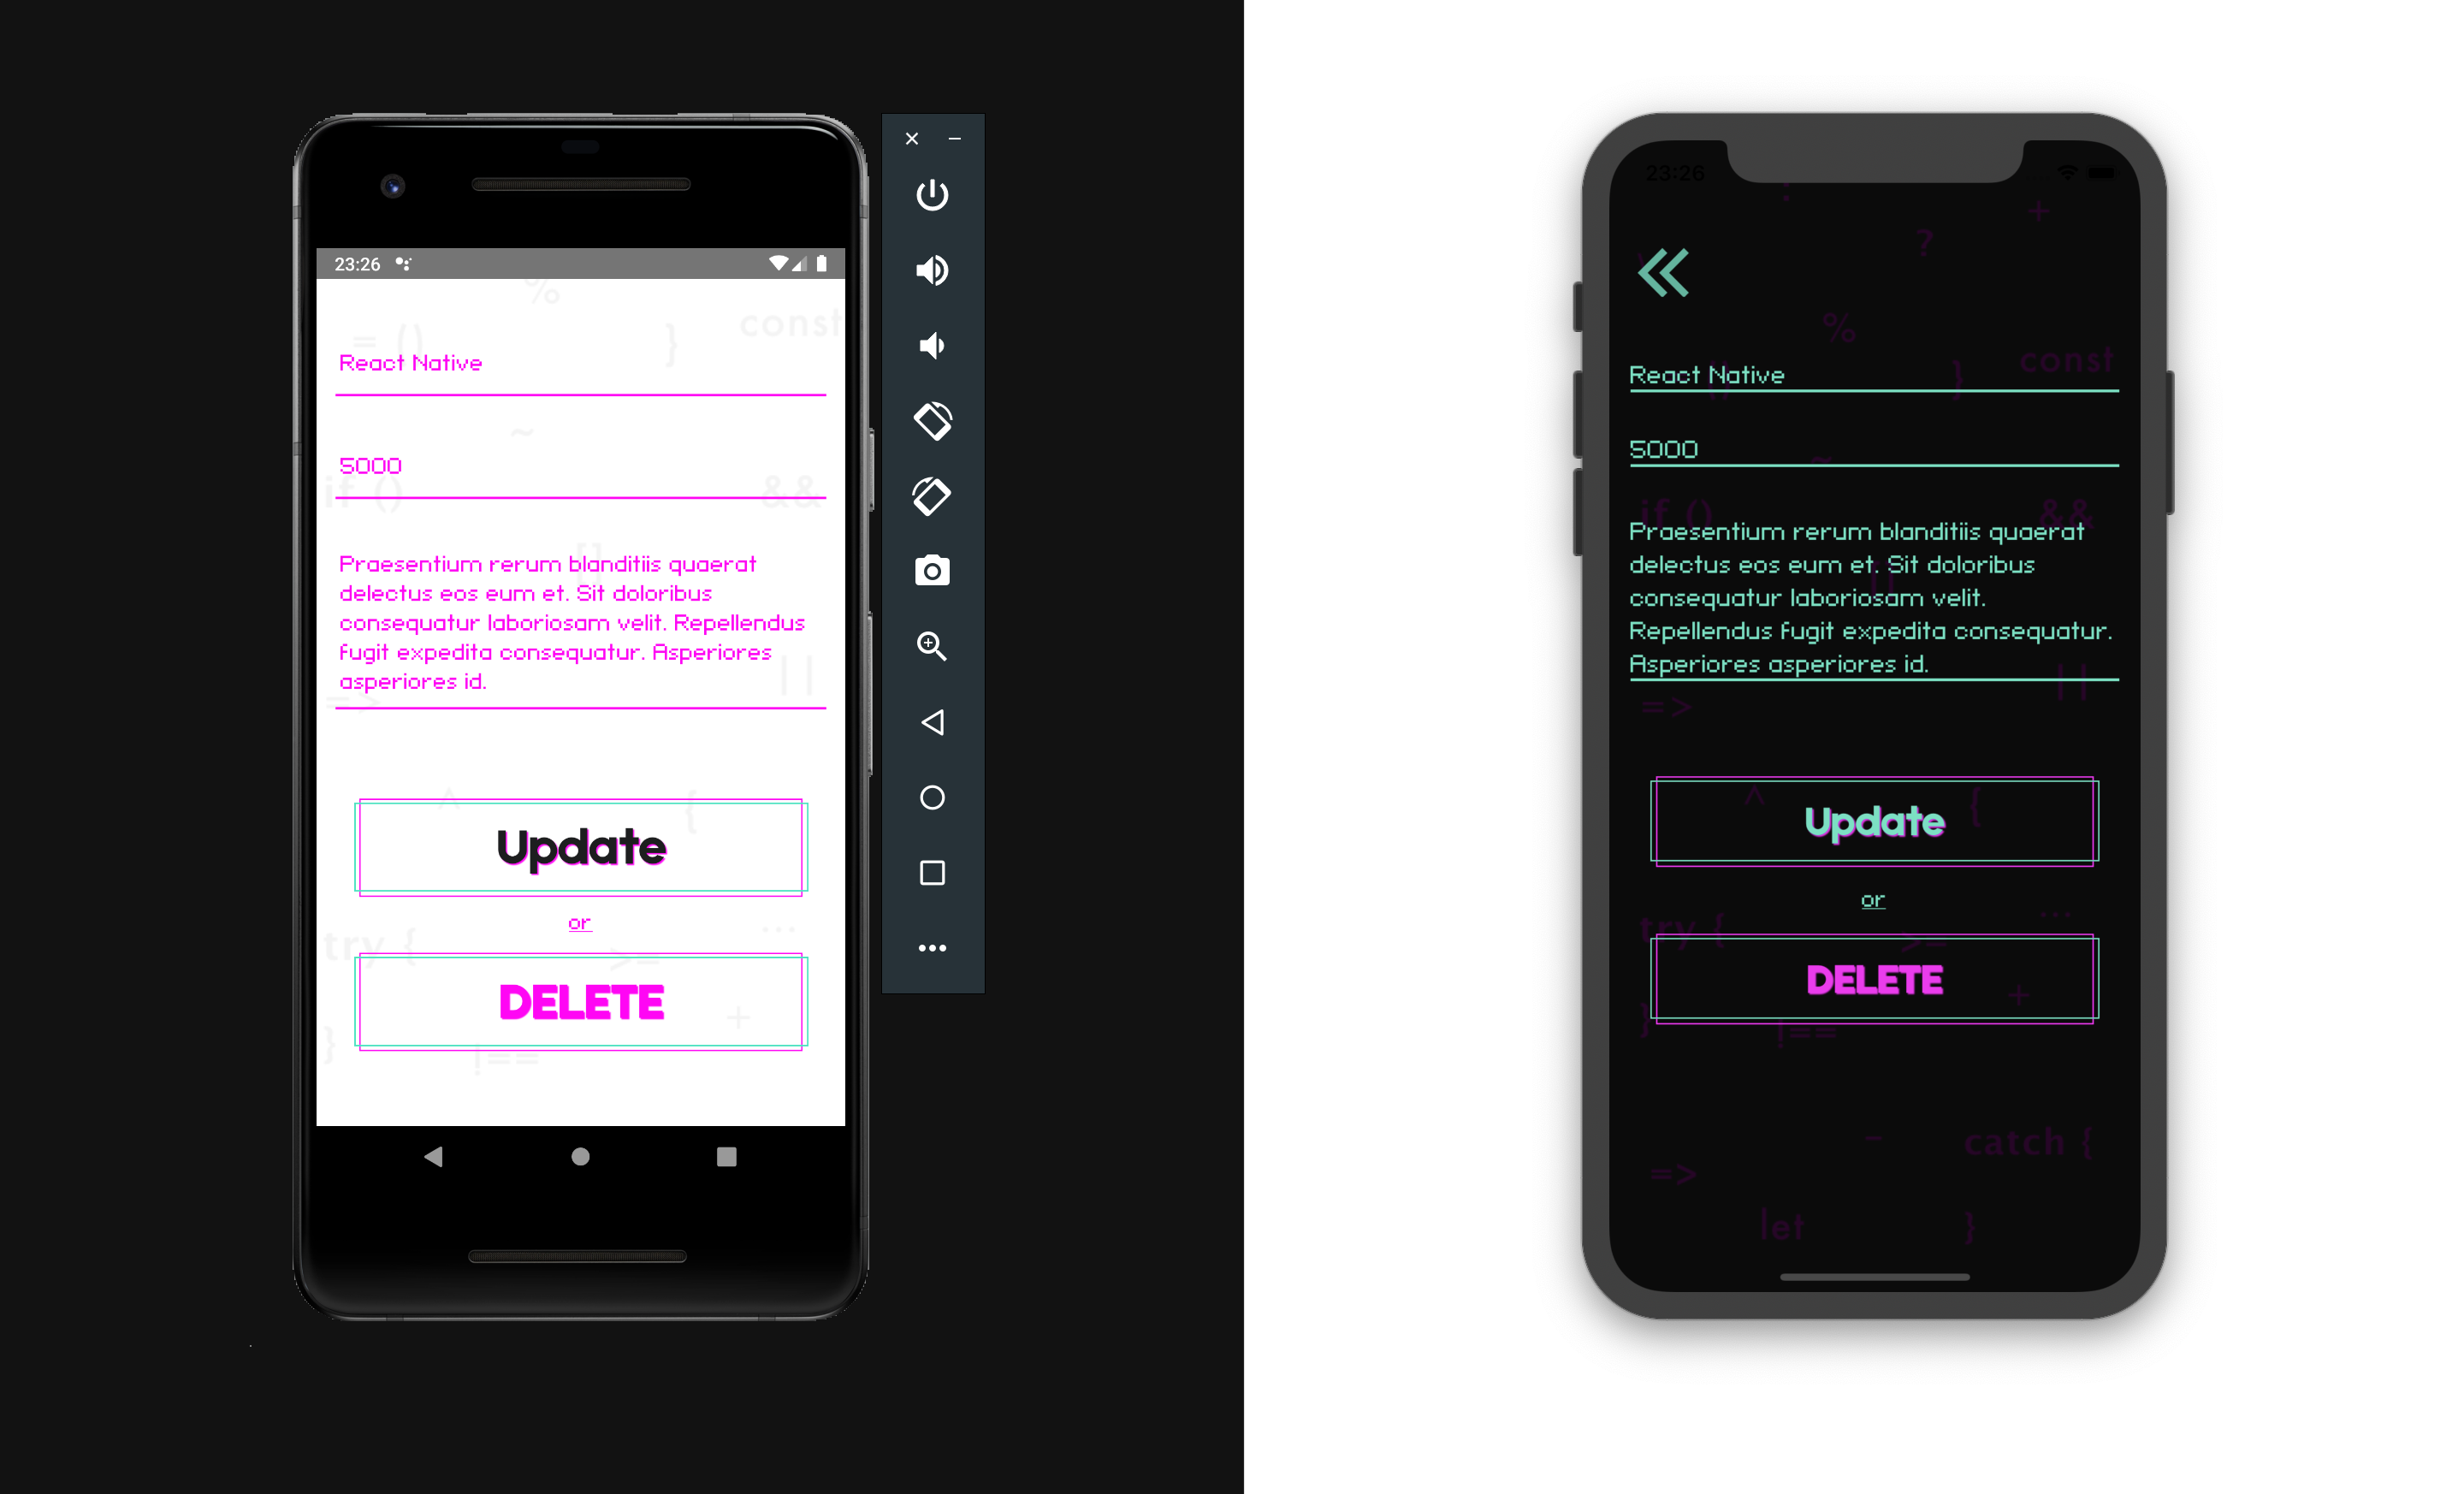
CREATE UPDATE DELETE#
Create the screen JobAdd src/screens/Jobs/JobAdd.js, where we perform the functions CREATE UPDATE DELETE
and in screens/Jobs/index.js we export screens

Navigation#
Add import of Jobs screens and connect them to StackNavigator

Jobs Button#
Editing the User screen in screens/Authenticator/User/index.js
Build the application and test
Done ✅#
References:#
https://learning.oreilly.com/library/view/full-stack-serverless/9781492059882/
https://www.altexsoft.com/blog/engineering/graphql-core-features-architecture-pros-and-cons/
https://engineering.fb.com/core-data/graphql-a-data-query-language/
