Push Notification with Amplify
Push notifications play an essential role in any Application. It can considerably increase the user engagement, and it might be an asked feature from the end-user.
Setting up a push notification from scratch can be a bit challenging. Fortunately, the Amplify provides the push notification services and SDK for our apps. In this tutorial, we learn how to integrate our app with this service.

Create a new project#
Whether you are going to implement only for IOS or Android, the following steps are required. If you are not working on a project, then the first step is creating one by the following command:
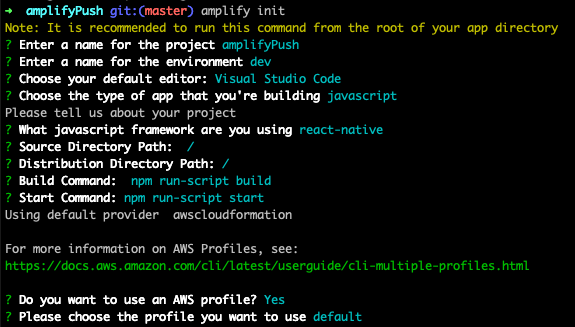
Initialize our AWS Amplify project in the root directory.
Here is how the answers can be:
- Add the required dependencies with:
or
You need to link the push notification dependency with:
caution
To prevent an error in the future add the netinfo library. You can add it to your project by the following command (in case your don't have it):

Android - Setting up the Firebase#
- Open the Firebase console.
- Open or create a project for further steps.
- Select the
Cloud Messagingin the dashboard.

- Click on the Android and follow the following steps:
- Fill in the form and register the app.
Android package namecan be found inandroid/app/build.gradle. It is stored asapplicationIdlike this:
- Download the config file to
android/appdirectory of the project. - Add the Firebase SDK as the instructions. Consider the
<project>theandroidand<app-module>theappdirectory in the react native project. Don't forget to add the latest version offirebase-messagingfrom here as well ad thefirebase-analyticsindependencies. - Run the project in Android and you will see that the verification of Firebase. (you can skip this step)
- Open the
android/app/src/main/AndroidManifest.xmland add the following code in theapplicationelement:

Setting up the Amplify for FCM#
- Add the push notification service to amplify by the following command in the project directory:
- Choose
FCMwhen promoted:
- Fill the pinpoint resource name (or just press enter without filling anything).
- You will be asked for
ApiKey. For getting that, you should do the following steps:
- Open the Firebase console and open the app you created in previous steps.
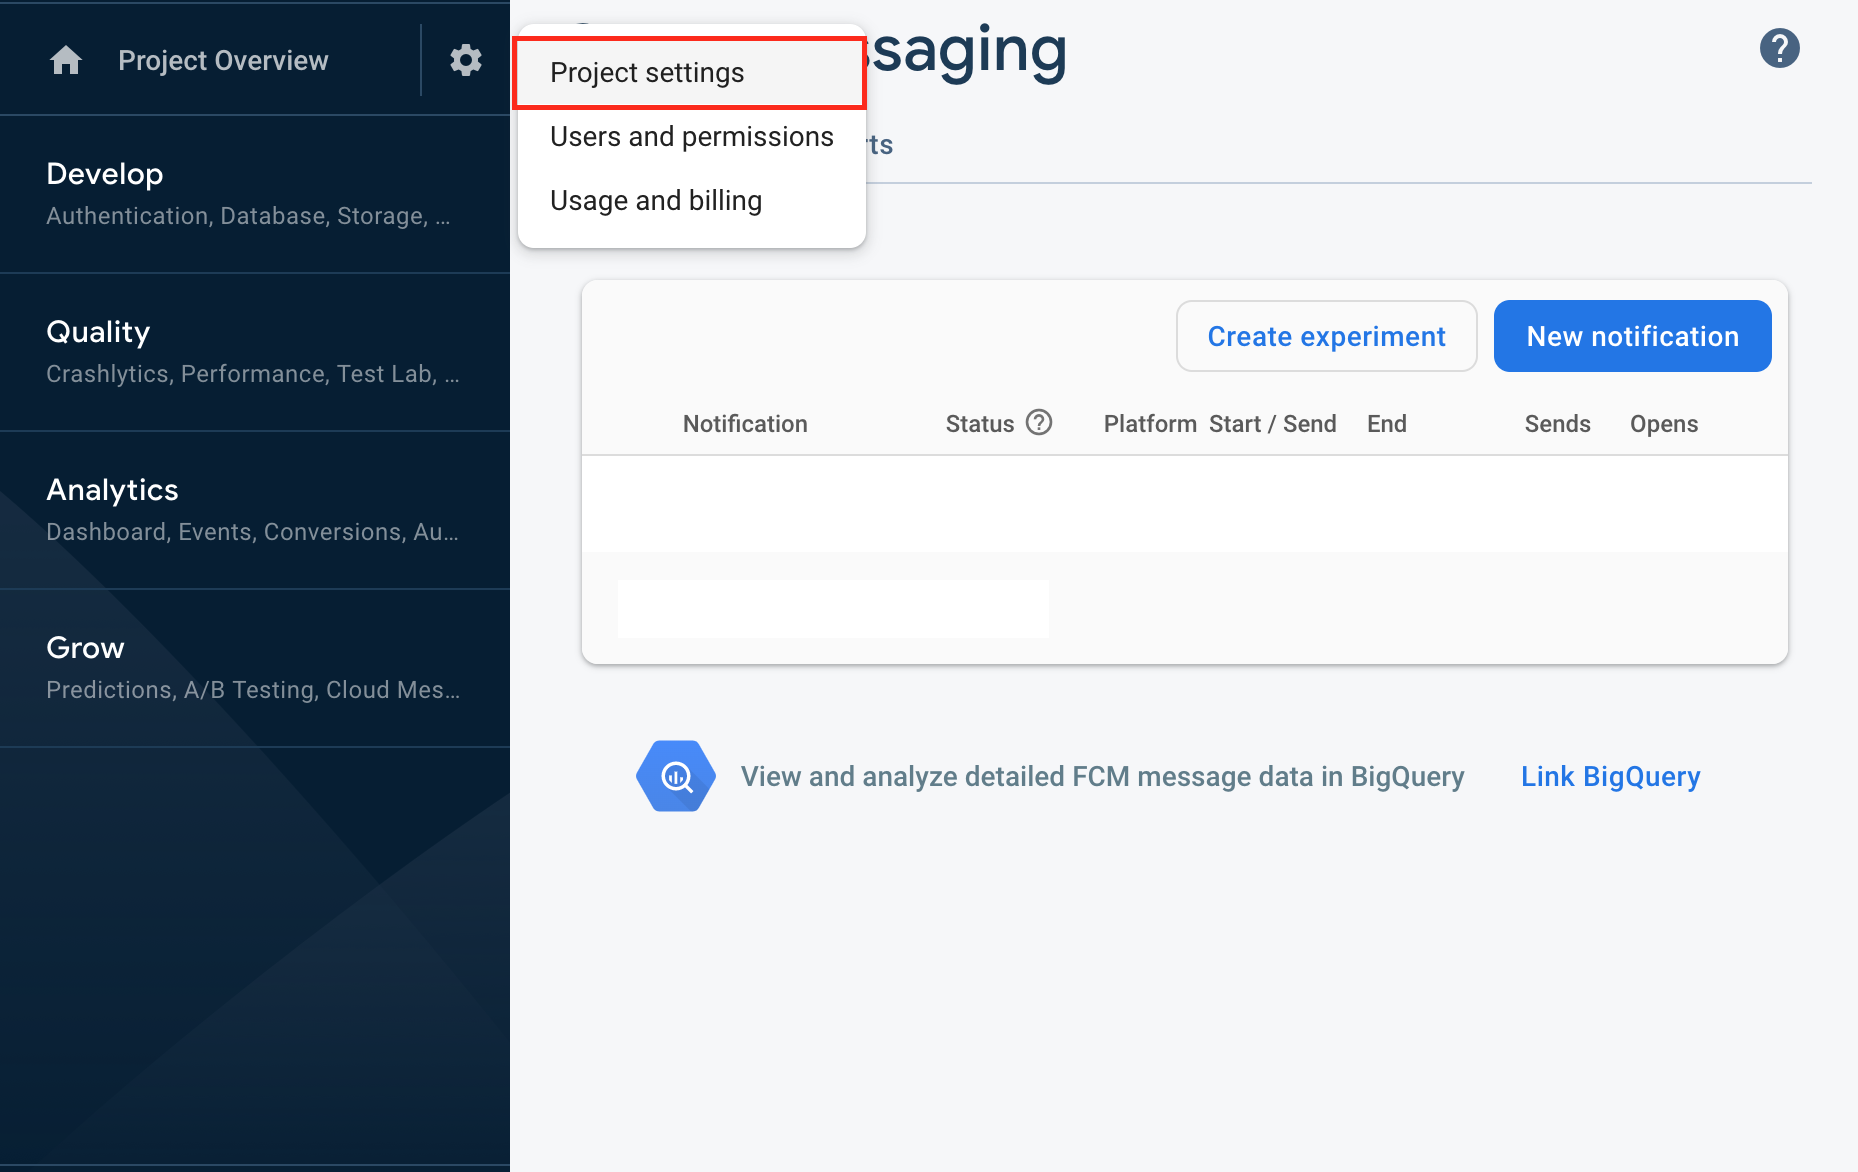
- Click on the gear icon in the
Project Overviewsection of the dashboard and select theProject settings.
- Select the
Cloud Messagingtab and copy the value of theServer key.
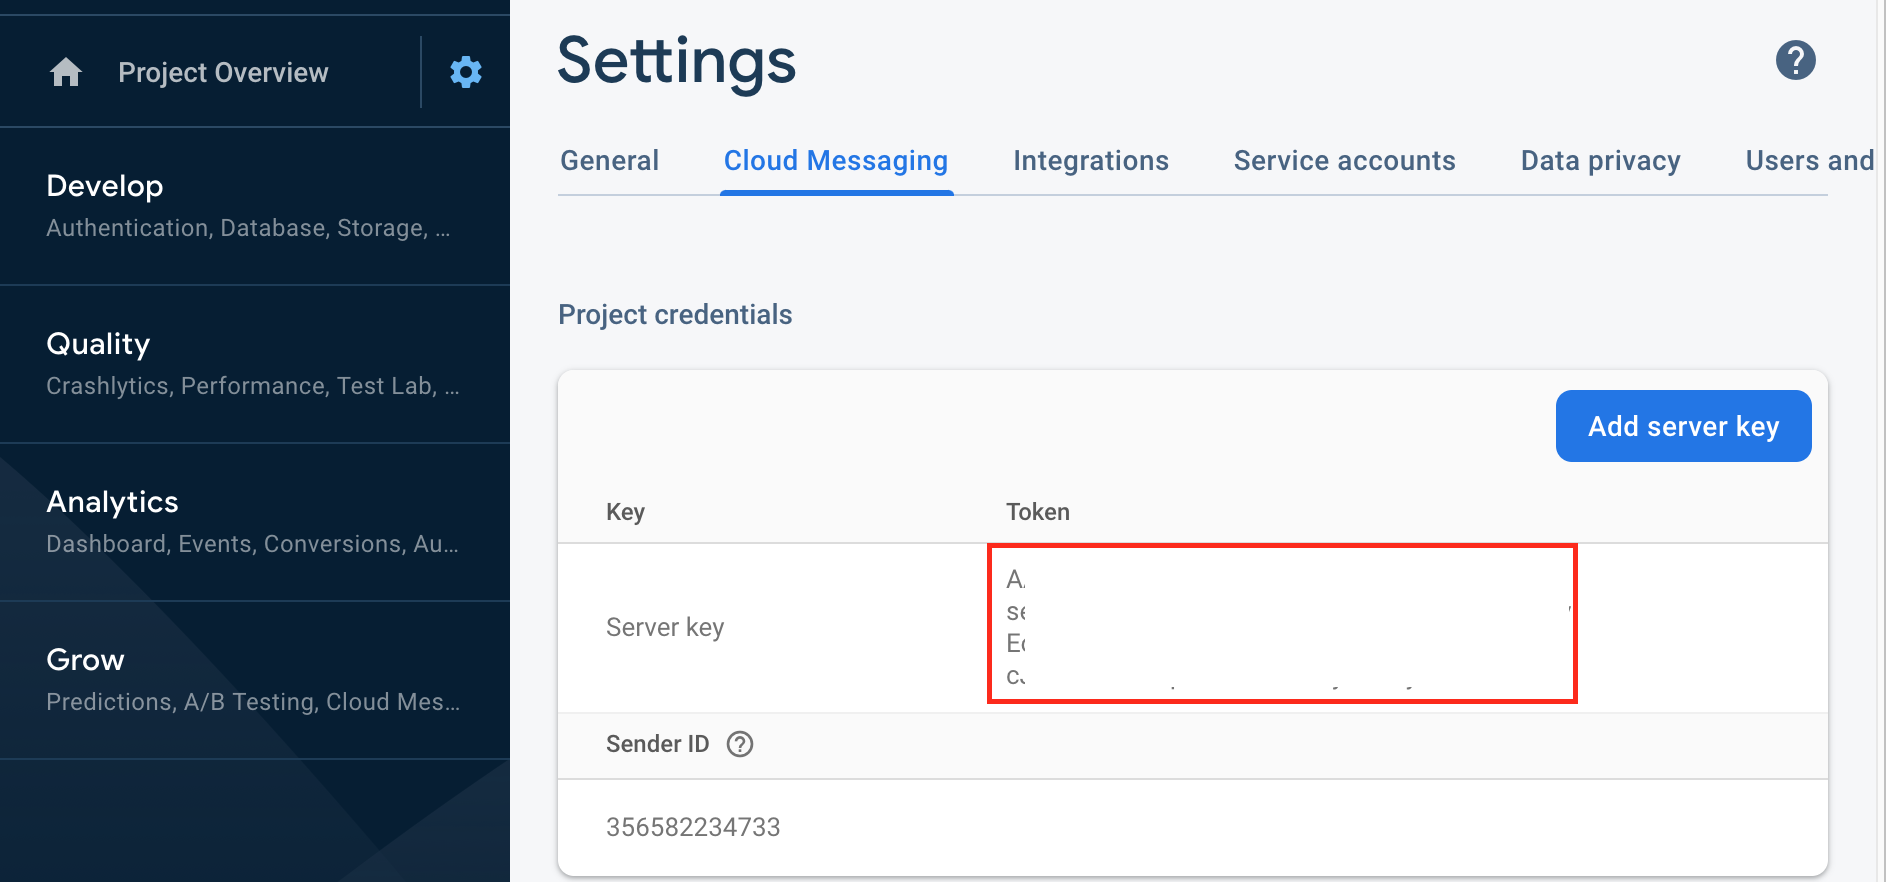
- Paste the value for requested
ApiKey. - After the setup is completed, run the
amplify pushcommand.

iOS - Setup#
- Add the
@react-native-community/push-notification-iosby the following command:
- yarn
- npm
Run
amplify push.Open the
.xcworkspaceproject with the XCode.Select the project and select the project name in
TARGETSsection. Select theSigning & Capabilitiesand press the+before theCapability. ChooseBackground Mode - Remote Notifications.

Configure App#
As it was told before, The Analytics should be integrated along with the notifications. It will help to track the notifications. Though it is possible to use custom properties, It is advised to use the aws-exports file.
in App.js file add the configuration as follow:

Working with API#
Usually, what we want is sending push notifications to specific users for various purposes. The API gives us various methods for handling our users & push notifications.
onRegister#
Each device can be recognized by the push token by which you can specify the device you want to get a push notification. When the user opens the app for the first time, the pushed token is fetched and stored in the device. You should be aware of the fact this method may get called again in the future, so you should be prepared for this situation to update your data according to it.
You can add the following code in App.js:
Attention
There can be an issue in android that this method never be called! However a workaround can be like this anywhere you might need the token:
onNotification#
In case you want to do something when the notification is recieved the onNotification method is for acting based on the recieved notification. Don't forget to that the notification object structure is diffrent from Android and IOS. In IOS, You Should use the finish method. You can add the following code to App.js:
onNotificationOpened#
A common scenario is reacting to when user opens a push notification (eg: opening a message etc). Whenever the user opens a push notification, the onNotificationOpened is called. The code can be in App.js as follow:
requestIOSPermissions#
Push notification works only on a real device and it won't recieve any notification unless the end user give the permission. The requestIOSPermissions is for getting this permission. It either can be called without any parameters, or you can customize by an object as follows:

Testing#
First of all, we want to take a look at the App.js file. Though you can work with the API anywhere in your code, It can be something like this:
Now we run our program:
To go further, we need one of the endpoint ID or Push Token.
Here is an explanation of endpoint in aws services:
An endpoint represents a destination that you can send messages to, such as a mobile device, email address, or phone number.
Push Token is a unique id, Which is generated and assigned by GCM(Android) or APNS(IOS) to your application in a specific device.
The most apparent difference between these two is that the endpoint is generated from aws, and defines the app in a device regardless of the platform(IOS/Android). But the push token is generated either by the Apple or Google, depending on the platform.
We use console.log to copy and keep these keys for the next steps. Go into the dev mode and copy the following values in your console:
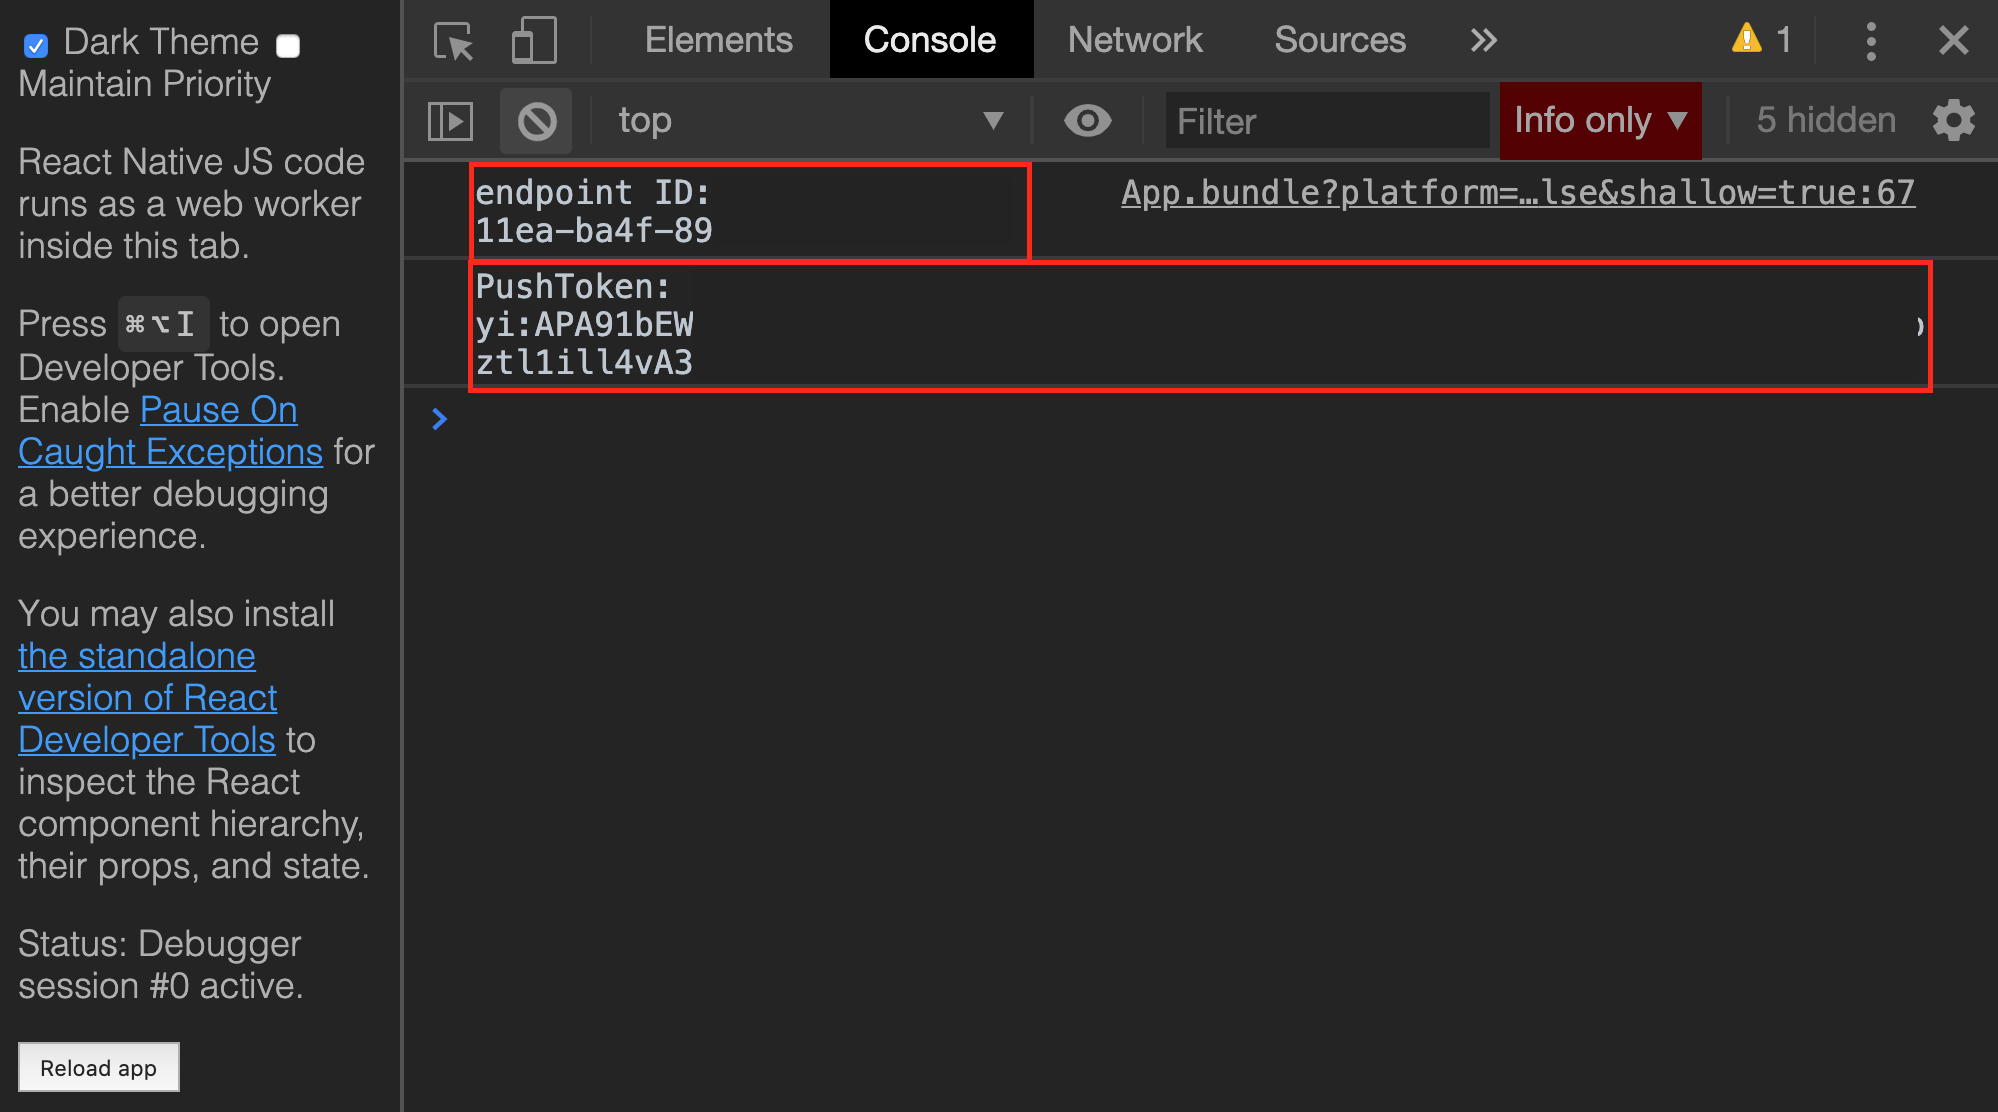
Although there are multiple ways to send a test push notification to a specific device, We're going to learn the easiest way possible.
- Run the following command in the root of the project:
The console of the app will be opened in the browser automatically.
Select the
Test messagingin the left sidebar:
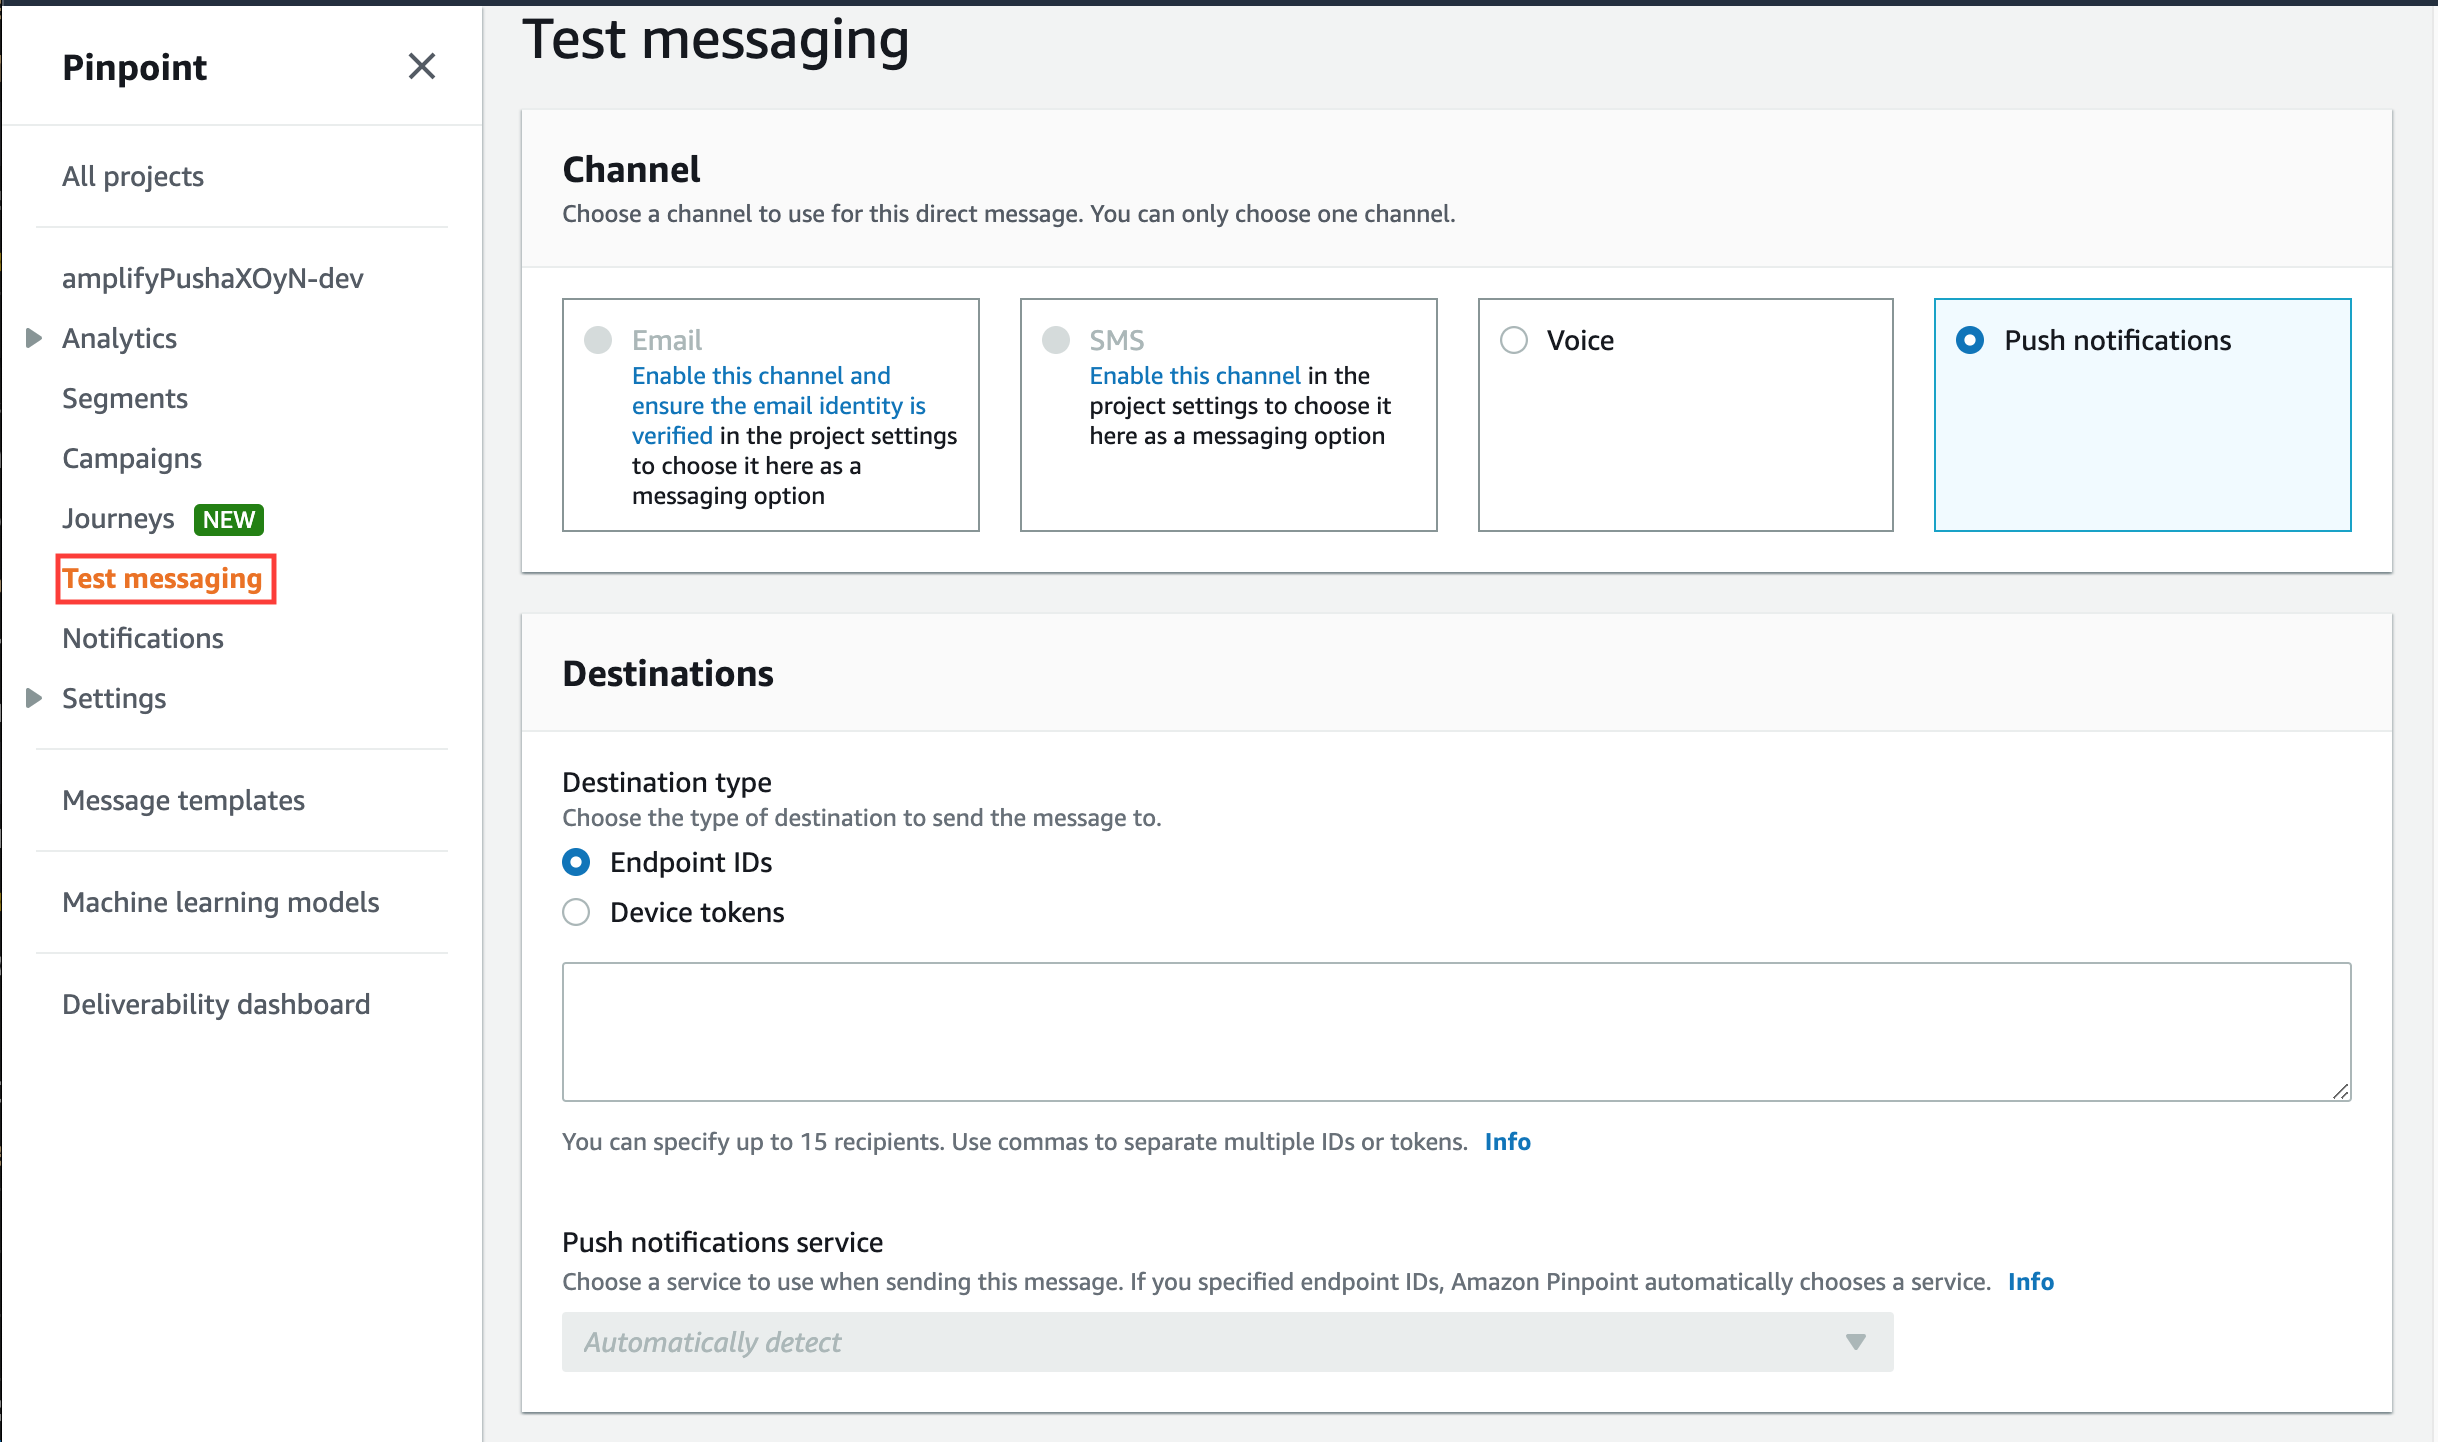
In the
Channelsection, select thePush notifications.The
Destinationssection is as follow:
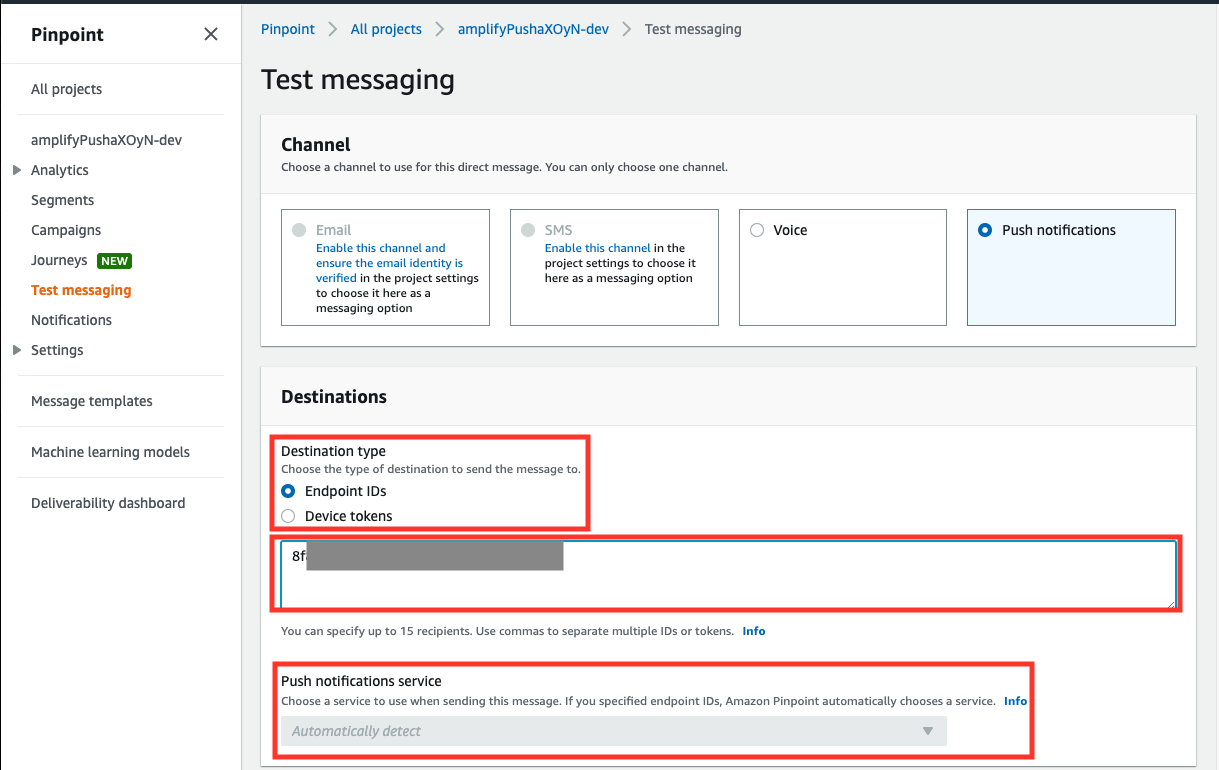 1.
1. Destination type defines whether you want to use Endpoint IDs or Device Tokens(or Push token in previous steps) in the next text input. 2. Paste the token you want to use, Based on the selected Destination type. 3. If you have chosen the Endpoint IDs and used endpoint, then the Push notifications service can automatically detect your device. Otherwise, if you have used Device token, for IOS, choose the APNS and for Android choose the FCM.
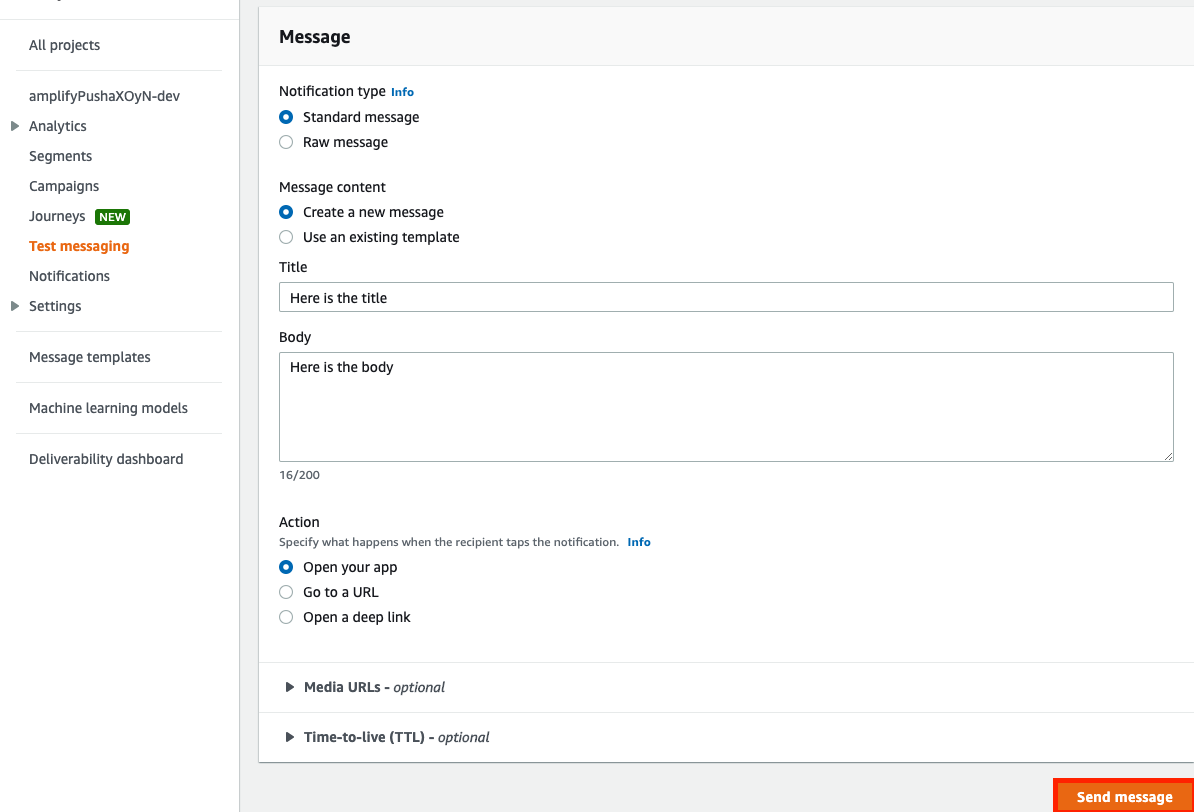
- You can fill the
Messagesection like below and press theSend messagebutton.
- You will get a success message like below if everything is ok.
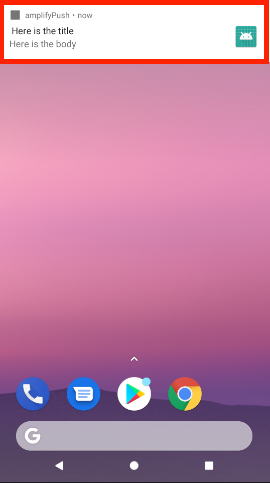
 After a couple of seconds, You will see the push notification in your device:
Done ✅#
References:#
Setting up Android Push Notifications with AWS Amplify
Testing Push Notifications with AWS Amplify & CLI
